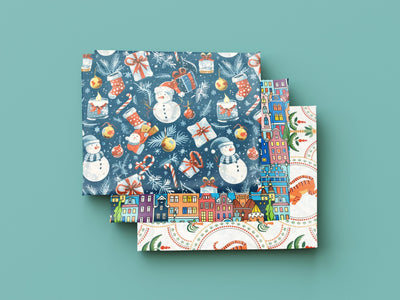
To make a Christmas stocking you need a paper pattern, about 0.5m of outer fabric, 0.5m of lining, and an evening at the sewing machine. You cut two outer pieces and two lining pieces in the shape of a stocking, sew each pair together, drop the lining inside the outer, and finish the top with a folded cuff and a hanging loop. This guide gives you the measurements for four sizes, how much fabric each one takes, and the steps in order.
Cotton is the easiest fabric to start with: it is stable, presses well, and our Christmas fabrics range has plenty of festive prints. Velvet, tartan and faux fur look more luxurious and are covered further down.
What you need
- Outer fabric: 0.5m of 112cm (44in) or wider fabric for one adult-size stocking with a matching cuff.
- Lining: 0.5m of plain cotton, polycotton or lining fabric.
- Cuff fabric (optional): if you want a contrasting cuff, a piece about 42cm x 30cm.
- Fusible fleece (optional): for a padded stocking that holds its shape.
- A strip for the hanging loop: 16cm x 5cm, cut from a leftover piece, or 16cm of ribbon.
- Basics: matching thread, pins or clips, fabric scissors, a large sheet of paper for the pattern and a ruler.
Cotton can shrink a little the first time it is washed, so if you plan to wash the stocking, prewash the fabric before you cut. How to wash fabric properly covers temperatures. Stockings that only come out once a year rarely need washing, so many people skip this step.
Christmas stocking sizes and how much fabric you need
There is no standard stocking size, so the table below gives four sensible ones. The pattern measurements include a 1cm seam allowance all round. "Width at the leg" is the straight upper part; "length of the foot" is the widest point, from the back of the heel to the tip of the toe.
| Size | Pattern height | Width at the leg | Length of the foot | Cuff piece | Outer fabric per stocking |
|---|---|---|---|---|---|
| Mini (tree decoration) | 22cm | 11cm | 15cm | 20cm x 14cm | A fat quarter makes two |
| Child | 38cm | 18cm | 26cm | 34cm x 24cm | 0.4m of 112cm wide |
| Adult (standard) | 48cm | 22cm | 32cm | 42cm x 30cm | 0.5m of 112cm wide |
| Large | 62cm | 27cm | 40cm | 52cm x 36cm | 0.65m of 140cm wide, or 1m of 112cm wide |
Those amounts include the cuff. If the cuff is in a different fabric, you only need room for the two outer pieces. Lining takes the same length as the outer fabric. For other festive projects, the complete UK fabric quantity guide covers how to work out amounts.
How the adult size fits on 0.5m. Each outer piece is 32cm across at its widest and 48cm tall, and the cuff is 42cm x 30cm. Lay the two outer pieces and the cuff side by side and they take 106cm of the width (32 + 32 + 42) and 48cm of the length, so they fit on a 0.5m cut of 112cm wide fabric. One metre makes two stockings.
The mini size is small enough to cut from a fat quarter, which is 50cm x 55cm in our fat quarter bundles. A set of minis in coordinated prints makes a good tree decoration or an advent garland.
Making the stocking pattern
- On a large sheet of paper, draw a rectangle for the leg: the width and height from the table, for example 22cm x 48cm for the adult size. Measure with a dressmaker’s tape; see our rulers and tape measures.
- At the bottom of the rectangle, extend the shape forward to make the foot, so the widest point measures the "length of the foot" from the table (32cm for the adult size). Draw a rounded heel at the back and a rounded toe at the front.
- Smooth the curve where the front of the leg meets the top of the foot. A gentle curve is easier to sew and turn out than a sharp corner.
- Cut out the pattern and mark which edge is the top.
The table measurements already include the 1cm seam allowance. The finished adult stocking measures about 46cm tall, with a top opening about 20cm wide.
Choosing the fabric
| Fabric | Good for | Things to know |
|---|---|---|
| Printed cotton | The outer and the lining | The easiest to sew. Add fusible fleece if you want the stocking to stand up. |
| Velvet | A luxurious outer or cuff | It has a pile, so cut every piece with the pile running the same way. Clips mark it less than pins. |
| Tartan | A traditional outer or cuff | Line the checks up across the two outer pieces, and allow extra fabric to do so. |
| Faux fur | Cuffs only | Cut from the back with small snips so you do not shear the fur. Too bulky for the whole stocking. |
| Plain cotton, polycotton or lining fabric | The lining | A smooth lining helps presents slide in and out. |
Our velvet fabrics are mostly sold in 3-metre pieces about 140cm wide. Four adult outer pieces fit across that width (4 x 32cm = 128cm), so one piece is enough for a whole family set of stockings, with cuffs in a contrasting fabric. Velvet, velour and velveteen behave differently under the machine; the difference between velvet, velour and velveteen explains which is which.
For a traditional look, a red or green check works well for the whole stocking or just the cuff. See our tartan fabrics for the current range. For a white, fluffy cuff, faux fur is the classic choice, although a cuff in quilting cotton or velvet is easier to sew.
How to sew a Christmas stocking, step by step
1. Cut the pieces
Fold the outer fabric in half, right sides together, and pin the pattern on top. Cutting through both layers gives you a front and a back that face opposite ways, so they match when sewn. Do the same with the lining. Then cut one cuff piece and one loop strip. If your print has a clear up and down, check that the pattern piece is the right way up before you cut.
2. Add fusible fleece (optional)
For a padded stocking, cut two pieces of fusible fleece from the same pattern and iron them to the wrong side of the outer pieces, following the maker's instructions. You will find it in our interfacing and stabilisers range. After sewing, trim the fleece close to the stitching inside the seam allowance to reduce bulk.
3. Sew the outer
Place the two outer pieces right sides together. Sew around the sides and the foot with a 1cm seam allowance, leaving the top open. Snip small notches into the seam allowance around the toe and heel curves, taking care not to cut the stitching, then turn the outer right side out and press.
4. Sew the lining
Sew the two lining pieces together in the same way, but do not turn the lining out. Snip the curves as before. Slide the lining inside the outer, so the wrong sides face each other and the seams line up. Match the top edges and tack or pin them together all the way round. Fine glass-head pins are easiest to see and remove; understanding sewing pins explains the different types.
5. Make the hanging loop
Fold the 16cm x 5cm strip in half lengthways and press. Open it out, fold both long edges in to the centre crease, then fold in half again so you have a strip about 1.25cm wide. Stitch along the open edge. Ribbon works just as well and needs no folding; look in our haberdashery range.
6. Make and attach the cuff
Fold the cuff piece in half, short ends together, right sides facing, and sew the short edges with a 1cm seam to make a loop. Press the seam open. Then fold the loop in half lengthways with the wrong sides together, so the raw edges meet and the fold is at the bottom. It is now a double-layer band about 15cm deep, and both outer faces are the right side.
Slip the cuff inside the stocking so it sits against the lining, with its raw edges level with the top of the stocking and its seam lined up with the heel-side seam. Sew all the way round the top with a 1cm seam allowance through every layer, using a strong all-purpose sewing thread. Neaten the raw edges with a zigzag stitch, then pull the cuff up and fold it down over the outside of the stocking. The seam allowance now sits inside the stocking, and the cuff covers the top about 14cm deep.
Which side shows? The half of the cuff that faces the lining when you slip it inside is the half that shows once the cuff is folded down, and it keeps the same way up. So if your cuff has a one-way print or a name on it, place that half against the lining, right way up, before you sew.
7. Add the loop
Fold the loop strip in half to make an 8cm loop. Place the ends inside the stocking against the heel-side seam, so about 6cm of loop stands above the top edge. Stitch it firmly in place through the seam allowance, by machine or by hand.
Personalising your stocking
Add a name across the cuff before you sew the cuff into a loop, while the fabric is still flat. Work on one half of the cuff’s depth only, as the other half ends up hidden underneath:
- Appliqué: cut letters from scraps backed with fusible web, iron them on, and stitch around the edges with a narrow zigzag.
- Hand embroidery: draw the name with a water-soluble pen and backstitch or chain stitch over it.
- Machine embroidery or iron-on letters: quicker if you have the equipment, and easy to read from across the room. Our embroidery threads come in packs of assorted colours.
Press the lengthways fold line first so you know which half you are working on. For the adult size, centre the name 11cm in from one short end of the cuff piece: the cuff seam sits at the heel side, so this places the name in the middle of one face of the stocking. Wrap the cuff round the top of the stocking to check which face before you stitch.
What does a homemade stocking cost?
Here is a worked example for two adult-size stockings in printed cotton, using prices from our listings at the time of writing. Prices and offers change, so treat these figures as a guide.
| Item | Amount | Indicative cost |
|---|---|---|
| Printed Christmas cotton, 114cm (45in) wide, for the outers and cuffs | 1m | about £3.50 |
| Lining fabric, such as taffeta | 0.5–1m, depending on width | about £1–£3 |
| Thread and ribbon | From your sewing box | about £1–£2 |
| Total for two | about £5.50–£8.50 |
Velvet, tartan or a faux fur cuff will raise the cost a little, while leftover fabric from other projects brings it down. If you make several, buying a longer length of the same print usually works out cheaper per stocking. Plain linings in long lengths are in our lining fabrics.
Stockings to sell or give
Personalised stockings are popular at Christmas markets because each one feels made for the buyer, and you can take name orders in advance. The UK craft fair guide to sewing to sell covers pricing, stall planning and which makes sell best.
If you are planning a run of Christmas makes, start with the stockings: they take longer than they look. When to start Christmas sewing sets out a week-by-week plan so everything is finished before the big day.
Christmas stocking FAQs
How much fabric do I need for a Christmas stocking?
For an adult-size stocking about 46cm tall, 0.5m of 112cm wide fabric covers the front, the back and a matching cuff. You need the same amount again for the lining. One metre of each makes two stockings.
What is the best fabric for a Christmas stocking?
Medium-weight cotton is the easiest to sew and comes in the widest choice of Christmas prints. Velvet and tartan look more traditional, and faux fur makes a classic cuff. A layer of fusible fleece helps any light fabric hold its shape.
Does a Christmas stocking need to be lined?
Not strictly, but lining hides the seams, makes the stocking stronger and helps presents slide in and out. Unlined stockings work best in fabrics that do not fray, such as fleece.
How big is a standard Christmas stocking?
There is no official size. Most handmade adult stockings are about 40cm to 50cm tall. Mini stockings for the tree are around 20cm, and children's stockings about 35cm.
Can a beginner sew a Christmas stocking?
Yes. It uses only straight seams and gentle curves, and cotton is forgiving to work with. Choose a non-directional print for your first one so you do not have to think about which way up the pieces go. A quilting cotton is a good starting point.