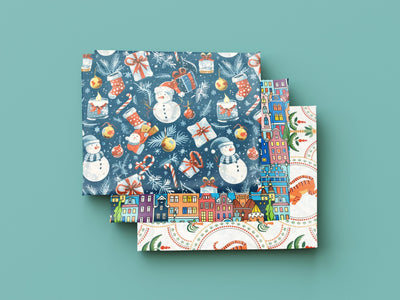
To make a fabric advent calendar, you sew 24 small numbered pockets in rows onto a fabric background panel, bind the edges and add a sleeve at the top for a dowel or hanging loop. A calendar about 55cm wide and 90cm tall takes roughly 2.4m of cotton in total: 1m for the front and back, four fat quarters for the pockets and 0.4m for the binding and sleeve. It uses only straight seams and takes about two evenings. This guide covers three styles of fabric advent calendar, the cutting list, the steps in order, how to number the pockets and what it costs.
It has to be filled and hanging by the evening of Monday 30 November, so it is the earliest deadline in the Christmas sewing year. Our Christmas fabrics are 112cm (45in) wide printed cotton, which is the width every measurement below is based on.
Three styles of fabric advent calendar
Most homemade fabric advent calendars are one of three types. The hanging pocket panel is the classic one and the main tutorial below. The two garlands are good alternatives if you want bigger gifts or a calendar for the tree or the mantelpiece.
| Style | Finished size | Fabric (112cm wide) | Time | Best for |
|---|---|---|---|---|
| Hanging pocket panel | About 55cm x 90cm, 24 pockets of 10cm x 10cm | 1.4m cotton plus 4 fat quarters | Two evenings | Chocolates, notes and small toys; a wall or the back of a door |
| Drawstring bag garland | 24 bags of 10cm x 13cm on a 3m cord | 1m cotton, about 10m narrow ribbon | Two to three evenings | Bigger gifts; easy to refill each year |
| Mini stocking garland | 24 stockings 22cm tall on a 3m cord | 12 fat quarters (two 6-piece bundles) | Three to four evenings | The tree, the stairs or a mantelpiece |
All three use light, woven cotton that presses well and holds a crisp edge. A coordinated fat quarter bundle is the easiest way to get a set of matching prints for the pockets or the bags.
What you need for a hanging pocket calendar
- Background, front and back: 1m of printed or plain cotton. The two panels are cut side by side across the width.
- Pockets: four fat quarters in coordinating prints, or about 0.5m of one print. The 6-piece Christmas fat quarter bundle gives you four prints for the pockets and two spare for the number patches.
- Binding and sleeve: 0.4m of cotton in a contrast colour.
- Optional wadding: a thin layer between the front and back makes the calendar hang flatter and look more finished. A 2 metre bag wadding bundle is more than enough.
- To hang it: a 60cm length of dowel or garden cane, or about 70cm of ribbon or cord for a hanging loop.
- Basics: thread, pins or clips, fabric scissors, a ruler, chalk, an iron and a fabric pen or permanent marker for the numbers.
A rotary cutter and mat make cutting 24 identical pockets much quicker and more accurate than scissors, and a long ruler keeps the rows straight. You can find the cutter, tape measures and pins in our haberdashery. Wash and press the cotton before you cut, because the pockets and background can shrink by different amounts if one is washed later; the guide to washing fabric properly explains what to do for each fibre.
Cutting list and how much fabric you need
The sizes below include the seam allowances. The binding is sewn on without a seam allowance, so the background panels are cut to the finished size.
| Piece | Cut | How many | Cut from |
|---|---|---|---|
| Front and back panels | 55cm x 92cm | 2 | 1m of cotton, side by side across the 112cm width |
| Pockets | 12cm x 22cm | 24 | Six from each of four fat quarters (each fits up to eight) |
| Number patches (optional) | 6cm x 6cm | 24 | Fat quarter leftovers, or plain cotton |
| Binding strips | 6cm x 112cm | 3 | The 0.4m contrast cotton |
| Hanging sleeve | 12cm x 53cm | 1 | The 0.4m contrast cotton |
| Wadding (optional) | 55cm x 92cm | 1 | Thin bag wadding |
That adds up to the same 2.4m in our Christmas sewing plan: 1.4m of cotton plus four fat quarters. Each fat quarter is about 50cm x 55cm, and a 12cm x 22cm pocket fits four across and two down. If fat quarters are new to you, what a fat quarter is explains the size and how to cut from one.
The pocket layout
The 24 pockets sit in four columns and six rows. Each finished pocket is 10cm square. Across the 55cm width that leaves a 3cm margin at each side and a 3cm gap between columns. Down the 92cm height, leave 12cm at the top for the hanging sleeve and a title or decoration, a 3cm gap between rows and 5cm at the bottom. Mark the top of each row with a chalk line before you start, so every row sits straight.
How to make a fabric advent calendar, step by step
1. Cut everything out
Cut the front and back panels, the 24 pockets, the binding strips and the sleeve. Arrange the pockets on the front panel before you sew any of them, swapping prints until no two of the same sit side by side. It is much easier to move a cut rectangle than to unpick a sewn one. If you would rather pick every print yourself, you can make your own fat quarter bundle.
2. Number the pockets
Write or apply the numbers now, while each pocket is still a flat piece. Fold each pocket in half to 12cm x 11cm with the fold at the top, and mark the number in the middle of the front half. The ways to do it are covered in the next section. A fabric pen is quickest; a sewn-on patch looks neatest.
3. Sew the pockets
Fold each pocket in half right sides together so it measures 12cm x 11cm. Sew the two short sides with a 1cm seam, leaving the bottom open. Turn it right side out, push out the corners and press. Fold the raw bottom edges in by 1cm and press again. You now have a 10cm x 10cm pocket with a clean folded top. Sew them in a chain, one after another without cutting the thread, to save time.
4. Mark the rows on the front panel
Using the layout above and a long ruler or tape measure, chalk a line 12cm down from the top edge for the top of row one, then a line every 13cm below it. Mark the left edge of each column at 3cm, 16cm, 29cm and 42cm from the left side.
5. Sew the pockets on in rows
Pin all four pockets of a row in place, with the top of each pocket on the chalk line. Topstitch the sides and bottom of each pocket about 3mm from the edge, leaving the top open. Backstitch at the top of each side, because that is where the pocket takes the strain every time it is opened. Work row by row, not column by column, so you can sew a whole row without repositioning the panel. Plenty of pins help here; the guide to sewing pins and their uses covers which ones to choose.
6. Make the hanging sleeve
Turn under each short end of the sleeve by 1cm and stitch. Fold it in half lengthways, wrong sides together, so it measures 6cm x 51cm. Lay it along the top of the back panel, raw edges level with the top edge, and tack it in place within the seam allowance. The binding will hold it in.
7. Layer the panels
Lay the back panel face down, then the wadding if you are using it, then the front panel face up with the pockets on it. Pin or clip all round, and stitch the layers together about 5mm from the edge. If you used wadding, a line of stitching between each row of pockets stops the layers shifting. Our guide to wadding, interfacing and stuffing explains which thickness to use.
8. Bind the edges
Join the three binding strips end to end into one long strip. Fold it in half lengthways and press. Sew it to the front of the calendar, raw edges together, with a 1cm seam, folding neat mitres at the corners. Fold it over to the back and slipstitch or topstitch it down. A full 6cm strip folded this way gives a finished binding of about 1.5cm.
9. Hang it
Slide the dowel or cane through the sleeve and tie ribbon or cord, such as gold satin cord, to each end to make a hanging loop. Fill the pockets, and hang it by the evening of 30 November.
How to number the pockets
The numbers are what make it an advent calendar, so choose a method that suits your time and your fabric.
- Fabric pen or permanent marker: the quickest. Draw the number in pencil first, then go over it. Press with a hot iron once it is dry to help set it. It works best on plain or lightly printed pockets.
- Sewn-on number patches: write each number on a 6cm square of plain cotton, turn the edges under by 1cm, and topstitch it to the pocket front before sewing the pocket. Patches read well on busy Christmas prints.
- Appliqué numbers: cut the numbers from felt or cotton backed with fusible web and iron them on, then stitch round the edge. Slower, but the neatest result.
- Tags: hang a small card or fabric tag from each pocket with ribbon. Good if the calendar is for a child who will want to change it every year.
Fabric scraps are ideal for patches and appliqué numbers. For other ways to use the leftovers, see what to sew with fabric scraps.
A quicker version: no binding
If binding sounds like a step too far, make the background like a pillowcase instead. Cut the front and back panels 57cm x 94cm, which still fit side by side across 112cm wide fabric. Sew the pockets onto the front as above. Then place the front and back right sides together, sew all round with a 1cm seam, leaving a 15cm gap at the bottom, and turn it right side out. Press, then topstitch all round about 5mm from the edge, which closes the gap. Sew a ribbon loop at each top corner for hanging, or stitch a line 6cm below the top edge to make a channel for the dowel before you sew on the first row of pockets. This saves the 0.4m of binding fabric and about an hour.
A drawstring bag advent garland
A row of 24 tiny drawstring bags on a cord holds bigger gifts than pockets do, and the bags can be taken down, filled and rehung each day. The method is exactly the same as a full-size bag; our guide to making a drawstring bag has the steps.
- Finished bag: 10cm wide x 13cm tall.
- Cut: one rectangle 12cm x 34cm per bag, folded in half at the bottom.
- Fabric: cut the 34cm lengths across the width of 112cm fabric, three to a 12cm strip. Eight strips fit in 1m, so 1m makes 24 bags.
- Ties: about 40cm of narrow ribbon per bag, or 10m in total. A 30m pack of 6mm ribbon covers that with plenty to spare.
- To hang: about 3m of cord. Tie each bag on with its own ribbon, or use mini pegs.
Number the bags with a fabric pen or a tag before you thread the ribbon. Christmas prints, plain red and green cotton or a mix of all three look good on a long line.
A mini stocking advent garland
Mini stockings are the prettiest option and the slowest to make, because each one is a small curved shape. Use the mini size from our Christmas stocking guide: 22cm tall, 11cm wide at the leg, with a 15cm foot. A fat quarter makes two, so 24 stockings take 12 fat quarters, or two 6-piece bundles. Leave them unlined to save time, add a small ribbon loop at the top of each, and peg them along a cord. Hang them on the stairs, across a fireplace or round the tree.
If you would rather decorate the room than fill pockets, the same small Christmas prints make a string of festive flags; our guide to how to make bunting gives the sizes and amounts.
How much does a fabric advent calendar cost?
Using our Christmas cotton at £3.50 a metre and the 6-piece Christmas fat quarter bundle, the hanging pocket calendar costs:
| Item | Amount | Cost |
|---|---|---|
| Front and back | 1m Christmas cotton | £3.50 |
| Pockets and number patches | 6-piece Christmas fat quarter bundle | £9.25 |
| Binding and sleeve | 0.4m cotton | £1.40 |
| Total fabric | About £14 |
Wadding, thread and a dowel add a little more. If you use cheaper plain or printed cotton for the background and binding, or cut the pockets from your stash, it comes down a lot. At £1 a metre, the whole 2.4m costs £2.40. Our printed fabrics are worth a look for the background, especially for a calendar that is not strongly Christmassy and can stay up all December. The drawstring bag garland is the cheapest of the three: 1m of cotton and a pack of ribbon, about £6.50 in total. A good shop-bought fabric advent calendar usually costs several times as much, and does not come in your choice of prints.
What to put in a fabric advent calendar
A 10cm square pocket holds a wrapped chocolate, a small toy, a hair clip, a rolled note or a tree decoration. For children, mixing treats with small activities ("make a paper chain", "film night") makes it last longer than a sweet a day. For adults, try tea bags, mini toiletries, seed packets or a lottery scratchcard. If you want room for bigger gifts, make the drawstring bag garland instead, or make the bottom row of pockets taller for the last few days.
Making it with less than two weeks to go
If you are starting now, it is still easily done before 30 November. Spend one evening on cutting and numbering, and one on sewing the pockets on and binding. Order the fabric first, because Christmas prints sell through quickly in November, and wash and dry it as soon as it arrives. If you are short of time, choose the no-binding version and number the pockets with a fabric pen. If you are buying for other Christmas makes in the same order, the UK fabric quantity guide gives the amounts for every common project.
Advent calendars to sell
Handmade fabric advent calendars sell well at autumn craft fairs and online in October and early November, when people are still planning. Personalised ones with a child's name across the top sell for the most. Make your stock early, because demand stops almost completely after the first week of December. The UK guide to sewing to sell at craft fairs covers pricing, costs and what else to put on the stall.
Fabric advent calendar FAQs
How much fabric do I need for a fabric advent calendar?
For a hanging pocket calendar about 55cm x 90cm with 24 pockets, you need about 2.4m of cotton in total: 1m of 112cm wide cotton for the front and back, four fat quarters for the pockets and 0.4m for the binding and hanging sleeve. A drawstring bag garland of 24 bags takes 1m.
What is the best fabric for an advent calendar?
Medium-weight woven cotton is best, because it presses crisply, holds its shape and is easy to sew. Quilting cotton and printed Christmas cotton are ideal. Felt is fine for pockets and numbers but does not wash well. Our quilting fabrics are a good choice for a calendar you want to last for years.
What size should advent calendar pockets be?
A finished pocket of 10cm x 10cm holds most chocolates, notes and small toys and fits 24 onto a panel about 55cm x 90cm. Cut each pocket 12cm x 22cm and fold it in half for a clean top edge.
How long does it take to make a fabric advent calendar?
A hanging pocket calendar takes about four to five hours, or two evenings: one for cutting and numbering, one for sewing and binding. The no-binding version saves about an hour. A garland of mini stockings takes the longest, at three to four evenings.
Can I make a fabric advent calendar without a sewing machine?
Yes. Sew the pockets on by hand with a small backstitch and use the no-binding version, so you only have one seam round the outside to sew. It takes longer, so start at least a week before 30 November. For the basic kit you need for hand or machine sewing, see haberdashery essentials.